
DynamoDB Streams & Lambdaのローカル環境を作成する
Amazon DynamoDBには、DynamoDB Streamsというデータ更新を契機にAWSの各種リソースと連携する機能があります。
今回は、DynamoDB Streamsを用いたシステムをAWS上に開発するにあたり、ローカルの開発環境を組んでみます。
目次
- はじめに
- DynamoDB Localのインストールと起動
- AWS SAMのインストールとセットアップ
- DynamoDB Streams変更監視スクリプトの追加
- DynamoDBにテーブル追加 & Streamsの有効化
- 動作確認
- さいごに
はじめに
こんにちは。
クラウドソリューション第二グループのimai.kです。
業務でDynamoDB Streamsをコアとしたシステムを開発するにあたり、クラウド上の処理をローカルで再現する必要がありました。
そのため、実務で経験した内容をアウトプットしたいと思い、記載します。
今回のゴールは、以下のような構成です。
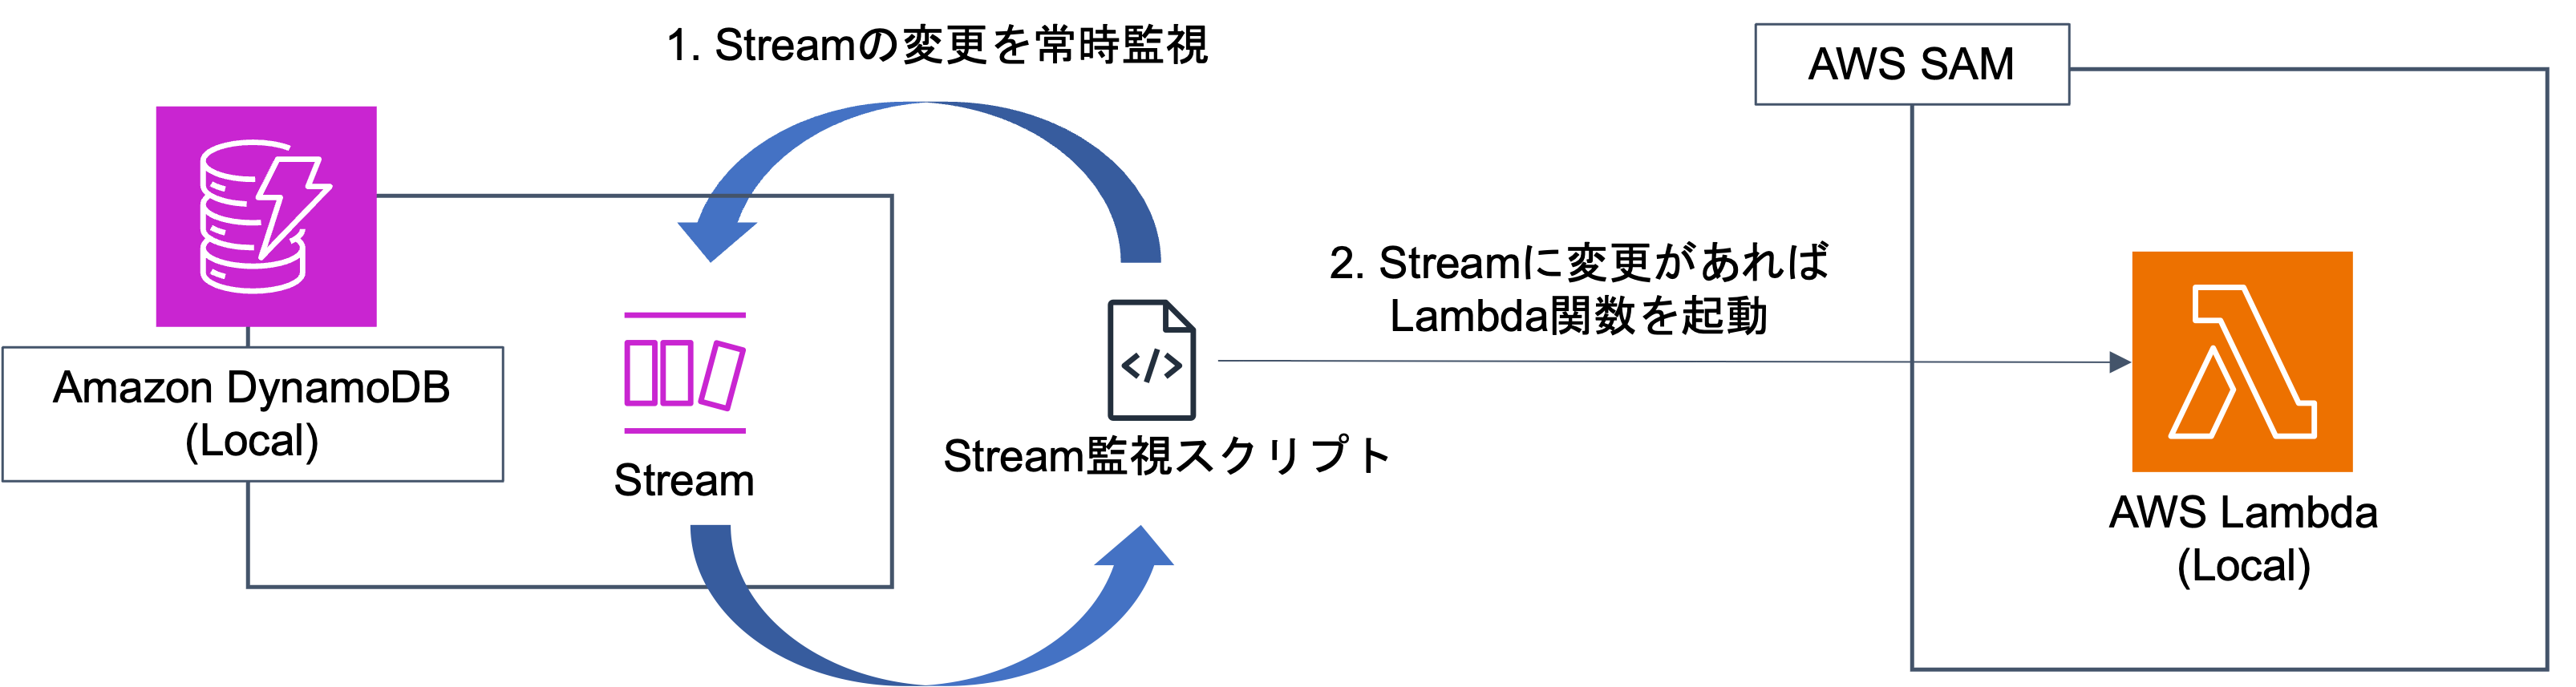
図の通りではありますが、実現したいことはDynamoDBのデータ変更を起点に、Lambdaを起動することにあります。
実際のAWS環境であれば、DynamoDB StreamとLambdaを接続することで比較的簡易に実現可能ですが、同様の仕組みをローカルで実現する場合、Streamsをポーリング・監視する仕組みを構築する必要があり、工夫が必要です。
では、やっていきます。
DynamoDB Localのインストールと起動
まずはDynamoDB Localをインストールしましょう。
インストール方法は、公式のページを参照してください。
インストール方法にもよりますが、DockerやJREの環境が必要です。別途ご準備ください。
なお、後ほどDockerを利用するため、ご利用の環境に合わせてDocker Desktopのインストールを行っておいてください。
DynamoDB Localのインストールができたら、立ち上げを行なっておきましょう。
以下の例では、jarのDynamoDB Localを起動しています。
$ java -Djava.library.path=./DynamoDBLocal_lib -jar DynamoDBLocal.jar -sharedDb


Initializing DynamoDB Local with the following configuration:

Port:	8000

InMemory:	false

Version:	2.3.0

DbPath:	null

SharedDb:	true

shouldDelayTransientStatuses:	false

CorsParams:	null
localhostのポート8000で動作していますね!
AWS SAMのインストールとセットアップ
次に、Streamsの変更を契機に起動するローカルのLambda関数を作成するために、AWS SAMをインストールします。
インストール方法は、DynamoDB Local同様に公式のページを参照してください。
AWS SAMのインストールができたら、ローカルで動作するLambda関数を用意します。
簡単のために、AWS SAMのサンプルのプロジェクトを作成します。
基本的に、こちらのページを参考に作成します。
任意のディレクトリに移動して、以下のように実行します。
今回はランタイムにPython(3.12)を使用します。
$ sam init


You can preselect a particular runtime or package type when using the `sam init` experience.

Call `sam init --help` to learn more.


Which template source would you like to use?

	1 - AWS Quick Start Templates

	2 - Custom Template Location

Choice: 1


Choose an AWS Quick Start application template

	1 - Hello World Example

	2 - Data processing

	3 - Hello World Example with Powertools for AWS Lambda

	4 - Multi-step workflow

	5 - Scheduled task

	6 - Standalone function

	7 - Serverless API

	8 - Infrastructure event management

	9 - Lambda Response Streaming

	10 - Serverless Connector Hello World Example

	11 - Multi-step workflow with Connectors

	12 - GraphQLApi Hello World Example

	13 - Full Stack

	14 - Lambda EFS example

	15 - Hello World Example With Powertools for AWS Lambda

	16 - DynamoDB Example

	17 - Machine Learning

Template: 1


Use the most popular runtime and package type? (Python and zip) [y/N]:


Which runtime would you like to use?

	1 - aot.dotnet7 (provided.al2)

	2 - dotnet8

	3 - dotnet6

	4 - go1.x

	5 - go (provided.al2)

	6 - go (provided.al2023)

	7 - graalvm.java11 (provided.al2)

	8 - graalvm.java17 (provided.al2)

	9 - java21

	10 - java17

	11 - java11

	12 - java8.al2

	13 - nodejs20.x

	14 - nodejs18.x

	15 - nodejs16.x

	16 - python3.9

	17 - python3.8

	18 - python3.12

	19 - python3.11

	20 - python3.10

	21 - ruby3.2

	22 - rust (provided.al2)

	23 - rust (provided.al2023)

Runtime: 18


What package type would you like to use?

	1 - Zip

	2 - Image

Package type: 1


Based on your selections, the only dependency manager available is pip.

We will proceed copying the template using pip.


Would you like to enable X-Ray tracing on the function(s) in your application?  [y/N]: N


Would you like to enable monitoring using CloudWatch Application Insights?

For more info, please view https://docs.aws.amazon.com/AmazonCloudWatch/latest/monitoring/cloudwatch-application-insights.html [y/N]: N


Would you like to set Structured Logging in JSON format on your Lambda functions?  [y/N]: N


Project name [sam-app]:


    -----------------------

    Generating application:

    -----------------------

    Name: sam-app

    Runtime: python3.12

    Architectures: x86_64

    Dependency Manager: pip

    Application Template: hello-world

    Output Directory: .

    Configuration file: sam-app/samconfig.toml


    Next steps can be found in the README file at sam-app/README.md


Commands you can use next

=========================

[*] Create pipeline: cd sam-app && sam pipeline init --bootstrap

[*] Validate SAM template: cd sam-app && sam validate

[*] Test Function in the Cloud: cd sam-app && sam sync --stack-name {stack-name} --watch
サンプルアプリが作成できたら、アプリケーションの動作確認をしておきましょう。
$ cd sam-app

$ sam local invoke
初めて実行するときはDockerコンテナのビルドが走るため、少々時間がかかりますが、以下のようにメッセージが表示されれば問題ありません。
{"statusCode": 200, "body": "{\"message\": \"hello world!\"}"}
DynamoDB Streams変更監視スクリプトの追加
では、今回の構成のコアになる変更監視スクリプトを作成・配置していきます。
上記で作成したsam-app直下に、以下スクリプト(stream_observer.py)を配置します。
import boto3

import time

import subprocess


table = 'test'

dynamodb = boto3.client('dynamodb', endpoint_url='http://localhost:8000')

dynamodb_streams = boto3.client('dynamodbstreams', endpoint_url='http://localhost:8000')


latest_stream_arn = dynamodb.describe_table(TableName=table)['Table']['LatestStreamArn']

shards = dynamodb_streams.describe_stream(StreamArn=latest_stream_arn)['StreamDescription']['Shards']


shard_iterators = {}

for shard in shards:

	shard_id = shard['ShardId']

	shard_iterators[shard_id] = dynamodb_streams.get_shard_iterator(

		StreamArn=latest_stream_arn,

		ShardId=shard_id,

		ShardIteratorType='LATEST',

	)['ShardIterator']


def invoke_function(records):

	print(records)


	# AWS SAMで作成した関数をローカルで呼び出す

	subprocess.call(["sam", "local", "invoke"])


while True:

	if shard_iterators == []:

		break


	for shard_id, iterator in [*shard_iterators.items()]:

		if iterator is None:

			del shard_iterators[shard_id]

			continue


		get_records_result = dynamodb_streams.get_records(ShardIterator=iterator)

		next_shard_iterator = get_records_result.get('NextShardIterator')


		records = get_records_result['Records']


		while next_shard_iterator == iterator:

			get_records_result = dynamodb_streams.get_records(ShardIterator=next_shard_iterator)

			next_shard_iterator = get_records_result.get('NextShardIterator')

			records.append(get_records_result['Records'])


		shard_iterators[shard_id] = next_shard_iterator

		if records == []:

			continue


		invoke_function(records)


	time.sleep(5)
DynamoDBにテーブル追加 & Streamsの有効化
次に、DynamoDBにテーブルを作成し、作成したテーブルのStreamsを有効化しましょう。
今回は、NoSQL WorkbenchからDynamoDBのローカル環境にテーブルを作ってみます。
NoSQL Workbenchの導入につきましては、ぜひこちらの記事をご参照ください。
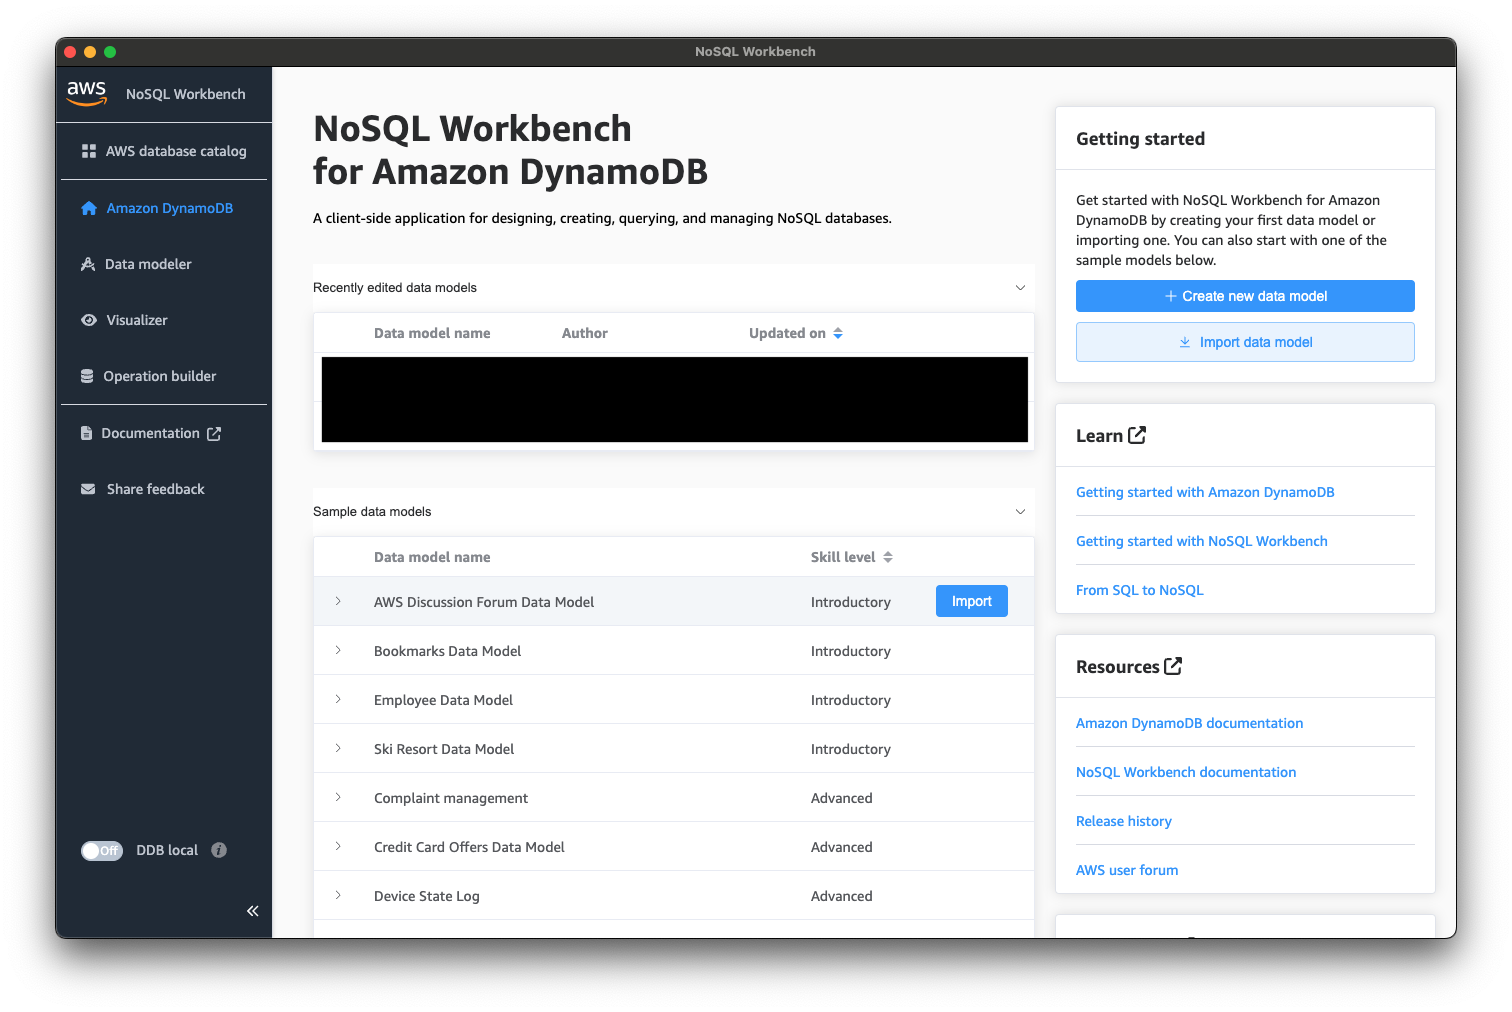
では、簡単のために、NoSQL Workbenchで用意されているSampleを利用していきます。
NoSQL Workbenchのトップページにある「Sample data models」から「AWS Discussion Forum Data Model」を選択し、「Import」してみましょう。
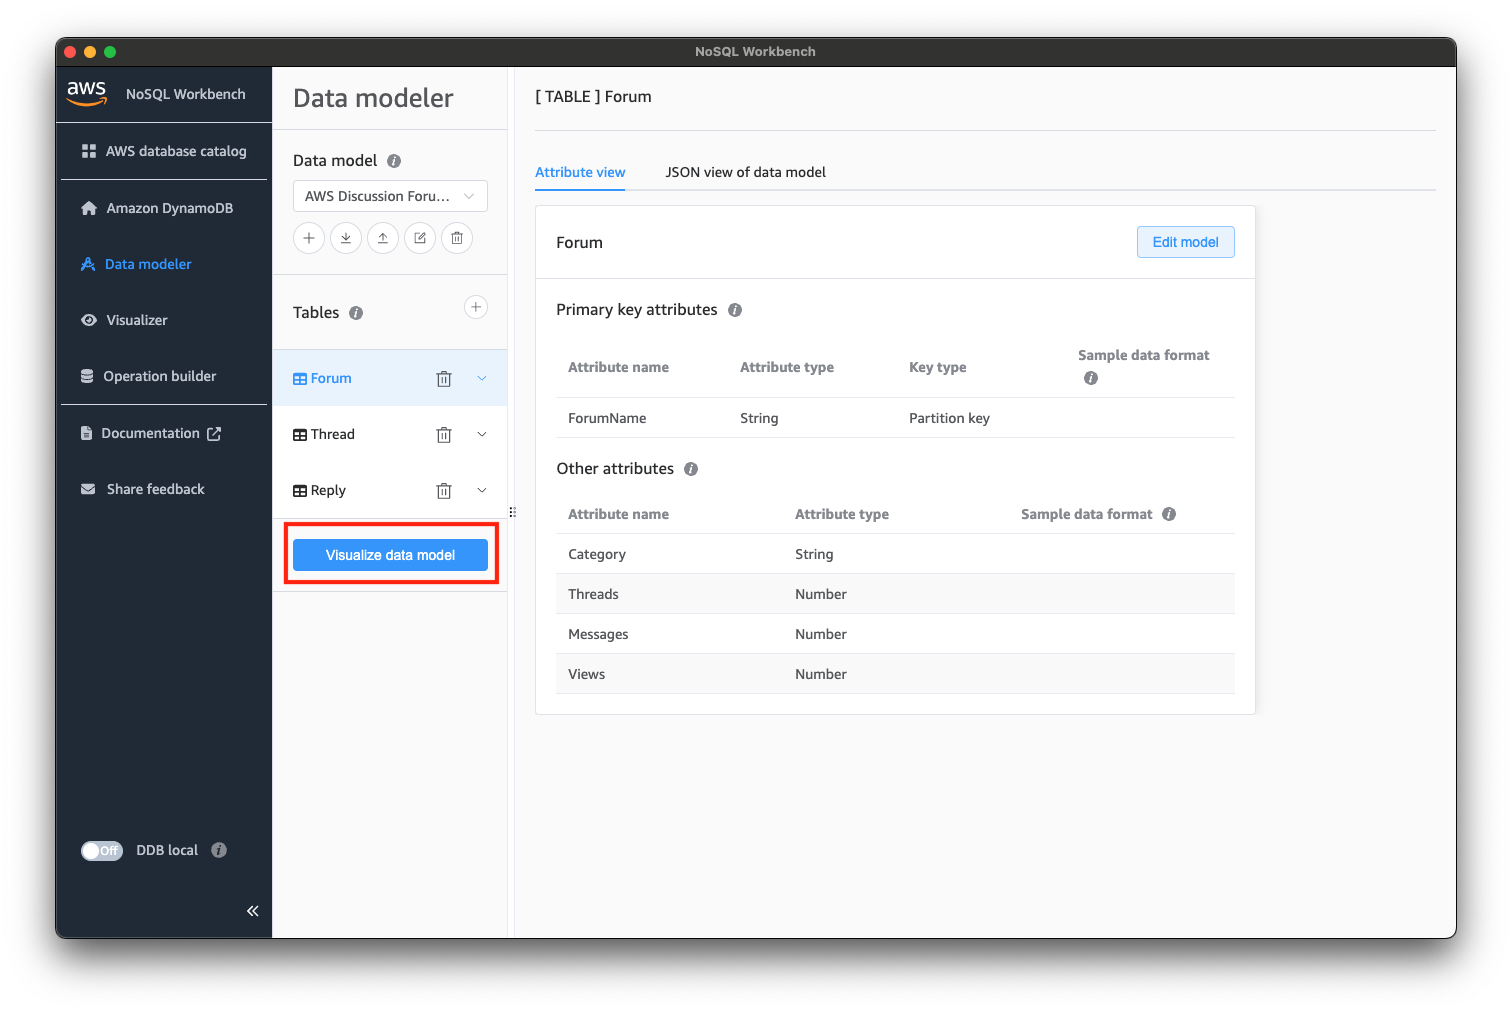
インポートすると「Data modeler」の画面に遷移すると思います。
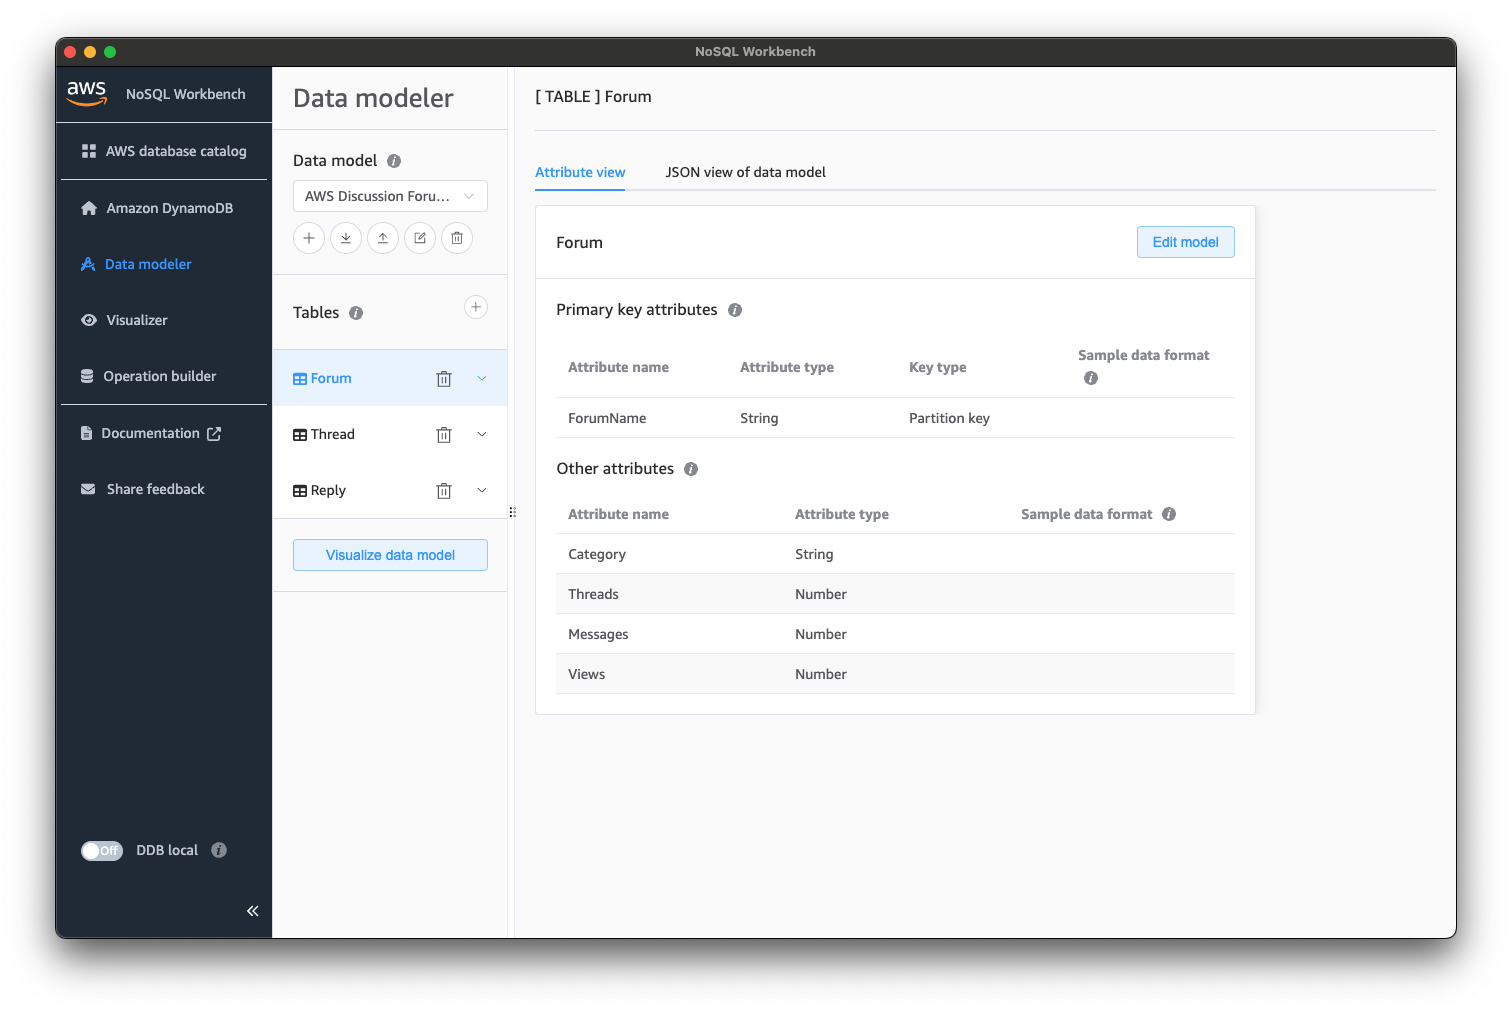
次に、「Visualize data model」を選択し、「Visualizer」の画面に遷移しましょう。
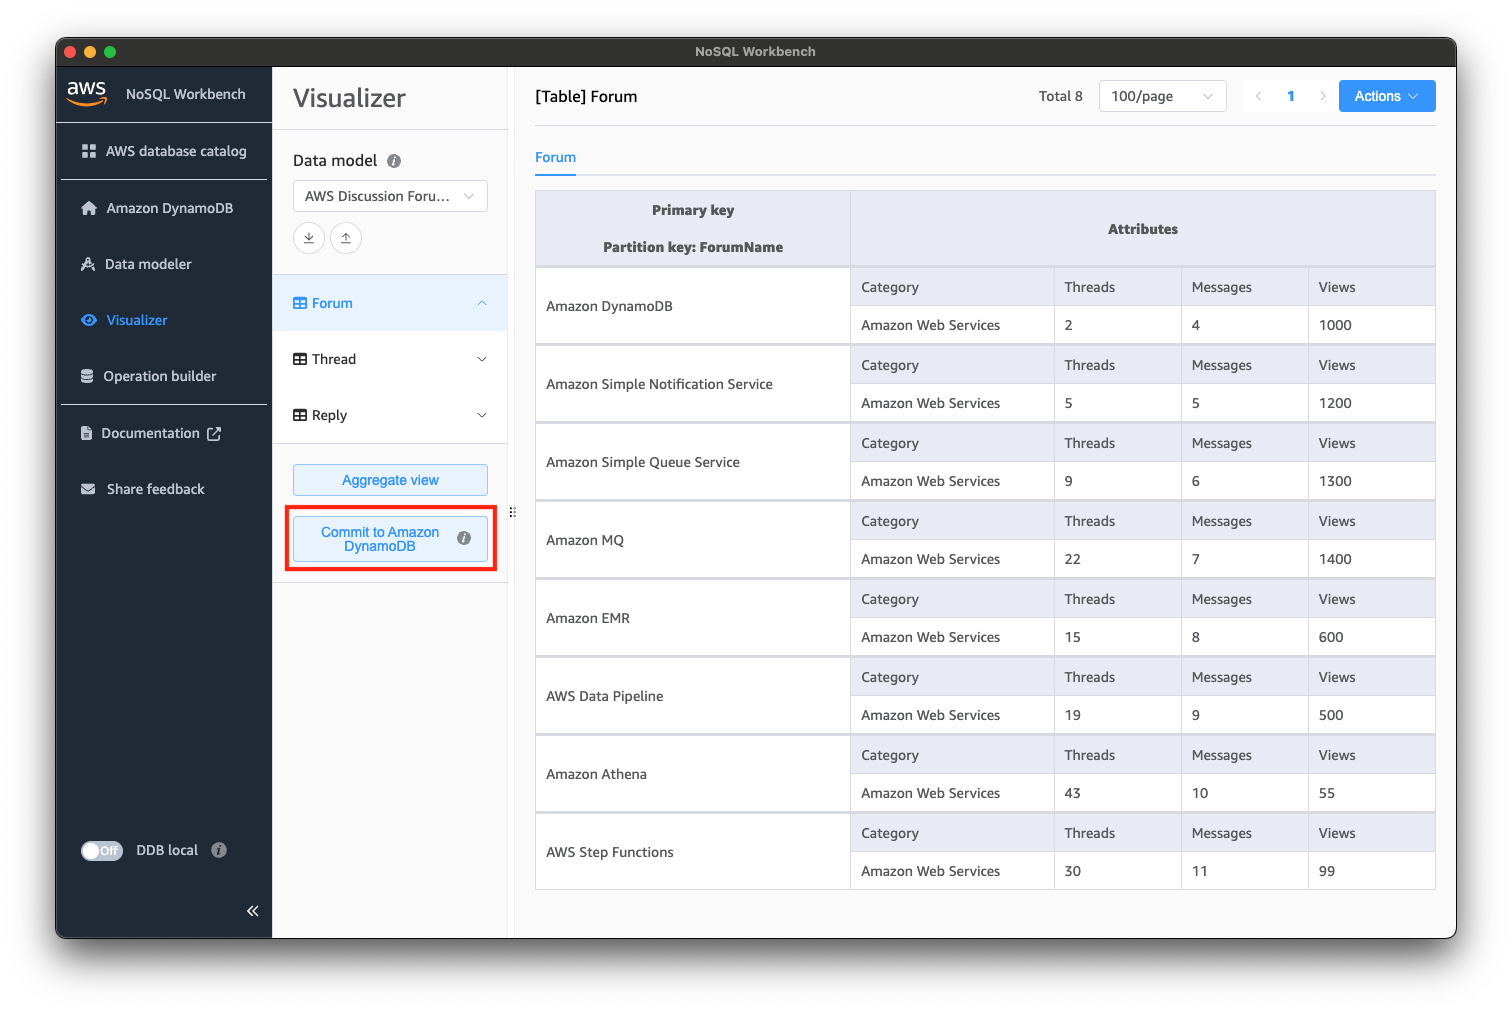
では、サンプルのテーブル・データをDynamoDB Localにコミットしていきます。
「Commit to Amazon DynamoDB」を選択しましょう。
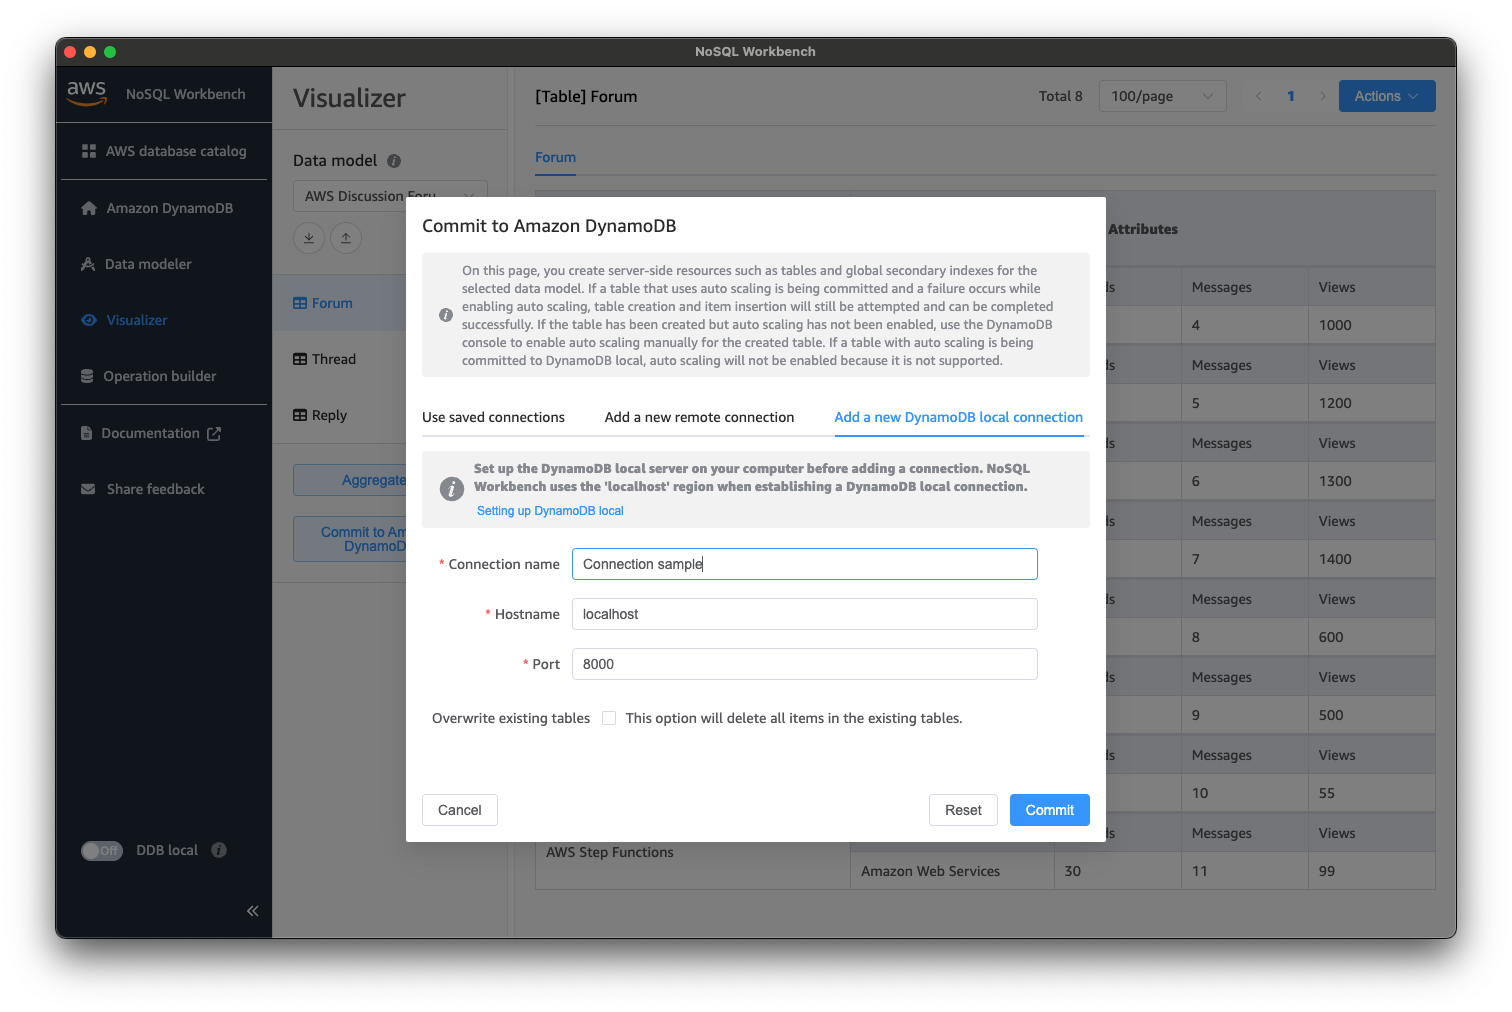
以下のようなダイアログが表示されると思いますので、「Add a new DynamoDB local connection」から、コネクションを作成しましょう。
今回は、localhostの8000番ポートに対してコネクションを作成し、コミットします。
コミットに成功すると、成功のダイアログが表示されると思います。
DynamoDB Localにテーブルが作成できたら、Streamsの有効化を行いましょう。
今回は、該当のテーブルのStreamsを有効化するPythonのスクリプトで有効化します。
任意のディレクトリに以下スクリプト(enable_stream.py)を配置します。
	import boto3
	dynamodb = boto3.client('dynamodb', endpoint_url='http://localhost:8000')
	# NoSQL Workbenchで作成したテーブルのStreamを有効化(一度実行すれば良い)

	response = dynamodb.update_table(TableName='Forum', StreamSpecification={

		'StreamEnabled': True,

		'StreamViewType': 'NEW_IMAGE'

	})
配置できたら、スクリプトを実行しておきましょう。
$ python enable_stream.py
動作確認
ここまでの作業で、下準備が整いましたので、動作確認を行います。
まずは、先ほど作成したstream_observer.pyを起動しておきます。
$ python stream_observer.py
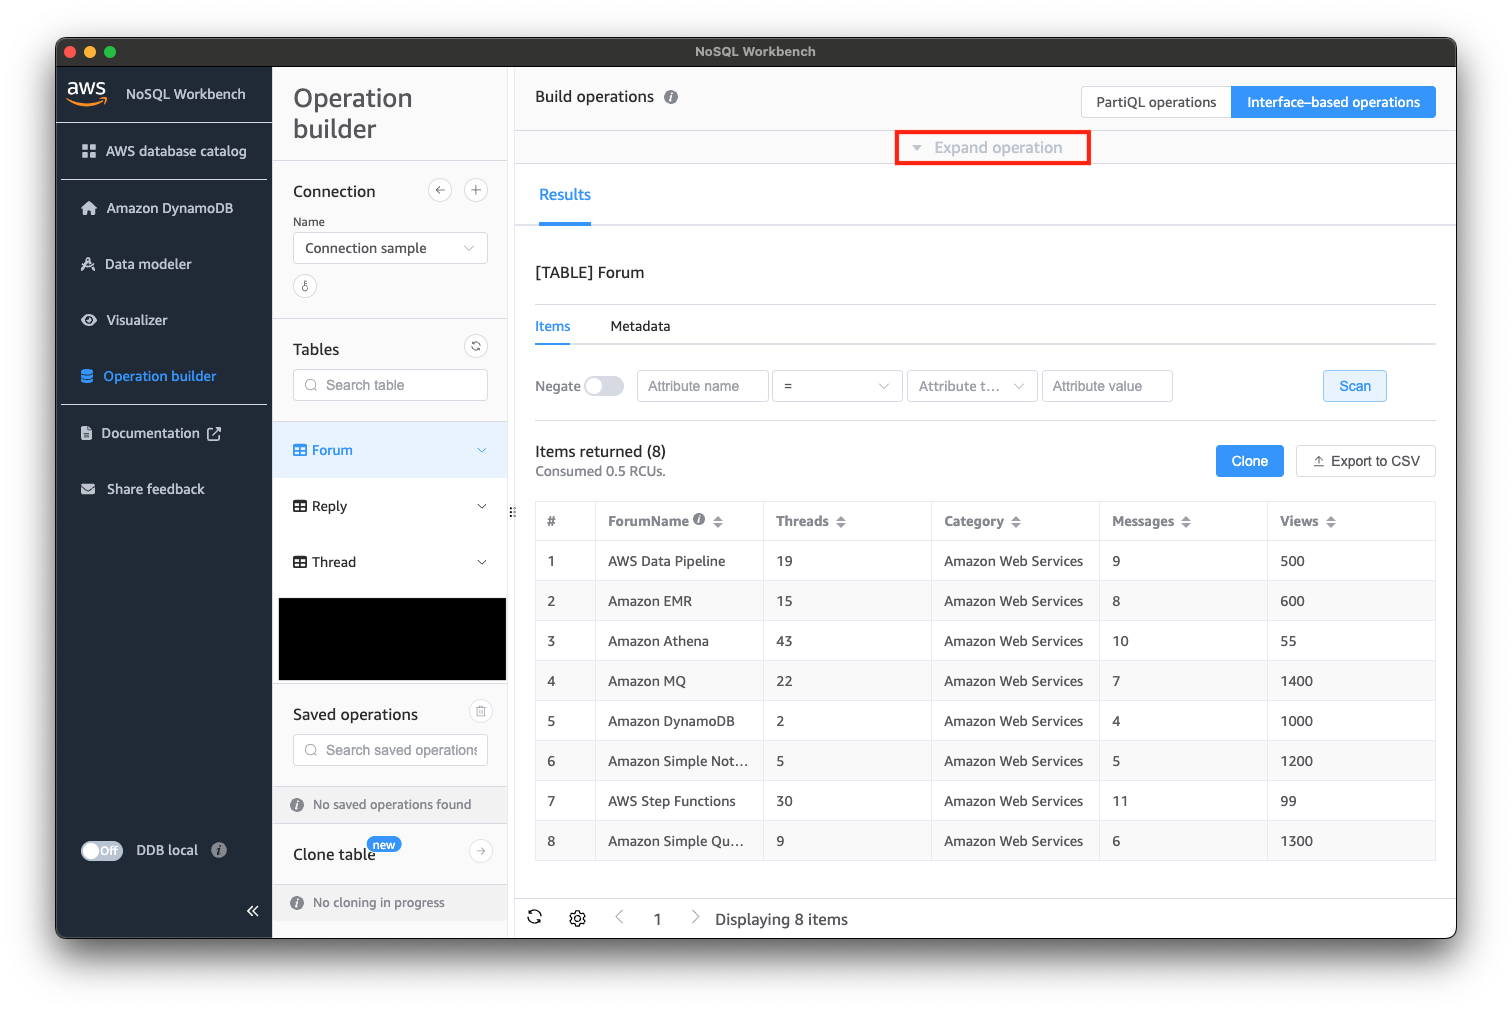
次に、NoSQL Workbenchからテーブルのデータを更新してみます。
「Operation builder」から先ほど作成したコネクションを使用して、DynamoDB Localに接続します。
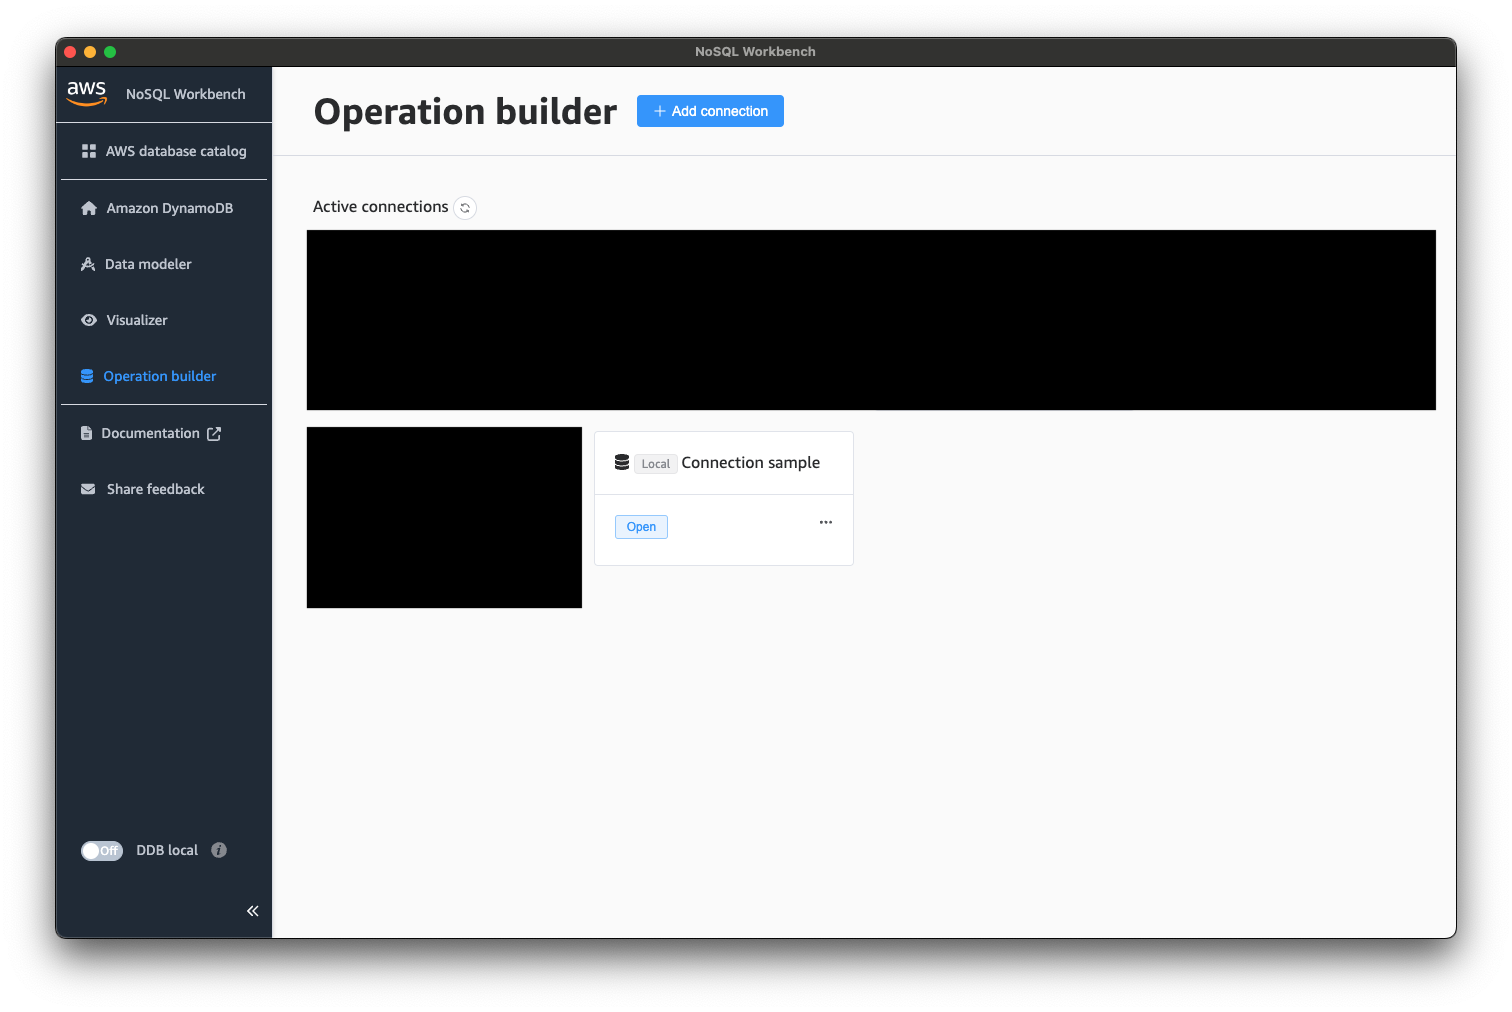
接続できたら、以下のようにデータを操作してみましょう。
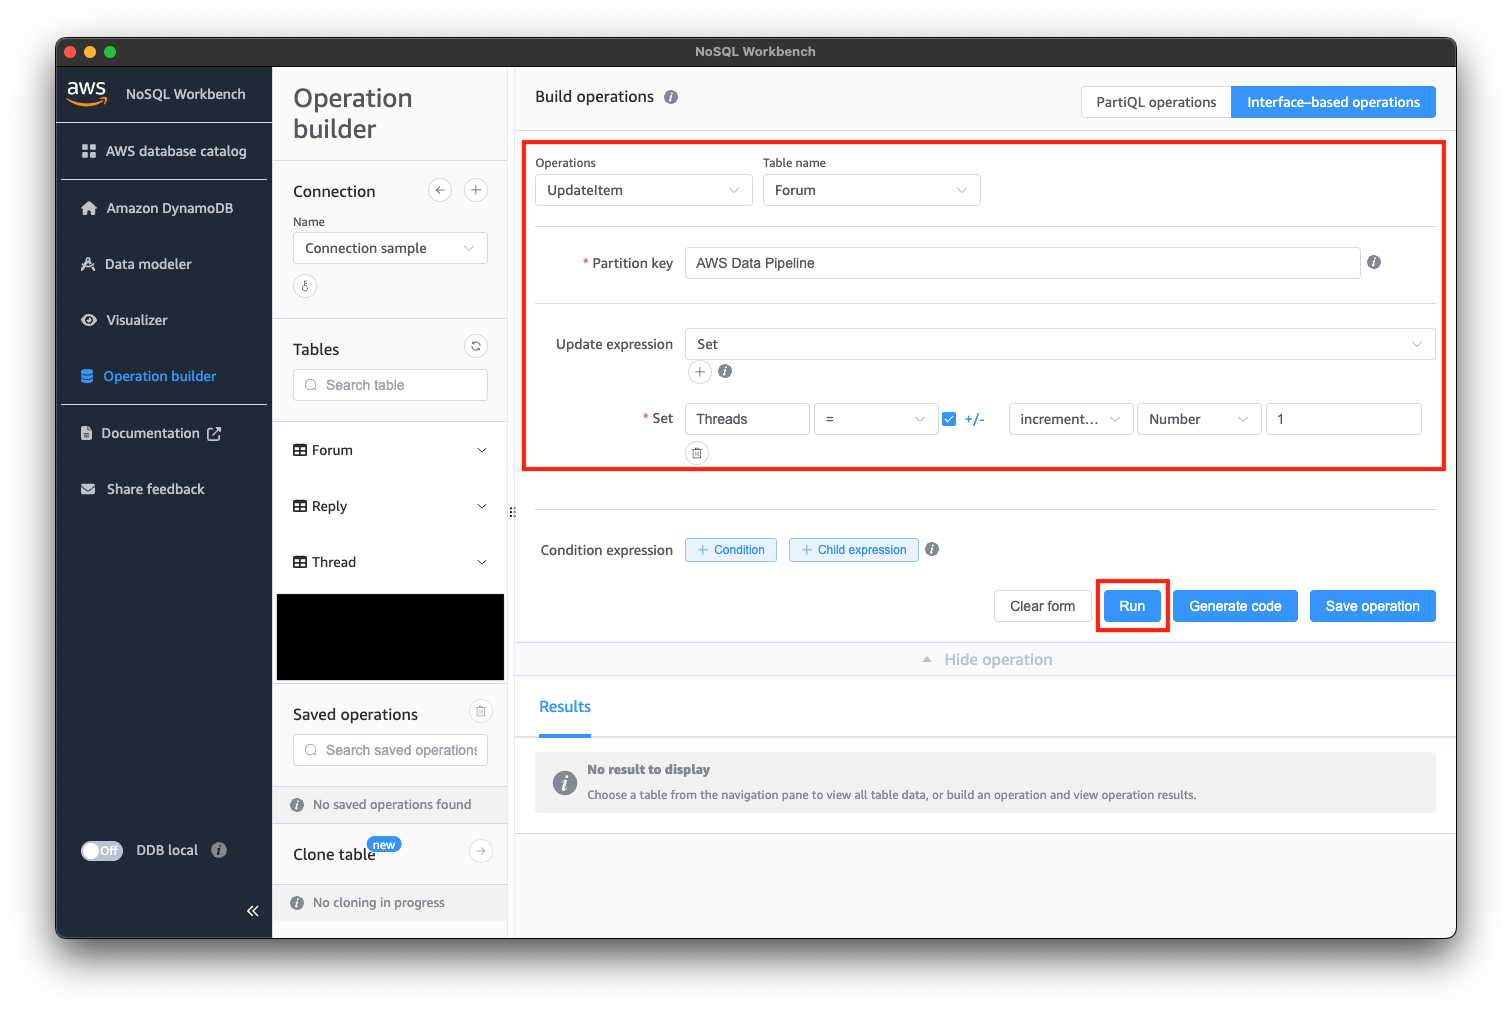
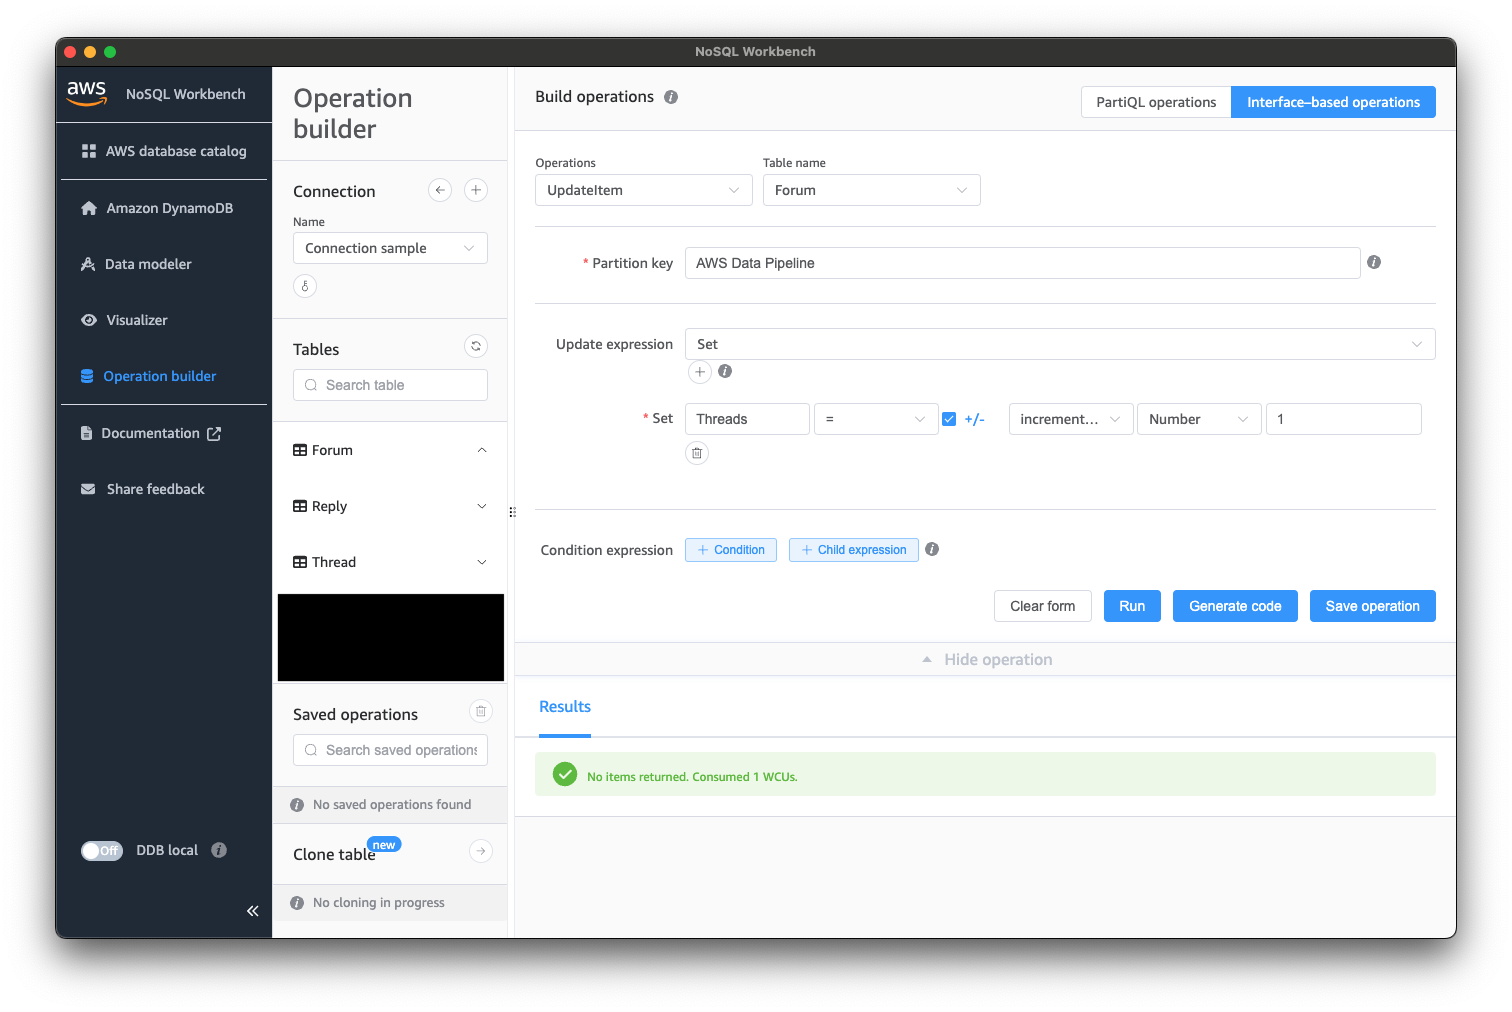
データが更新されると、stream_observer.py側で以下のように出力されると思います。
	python stream_observer.py


	[{'eventID': '71ee59c3-6170-4a4a-8bef-013823613f8e', 'eventName': 'MODIFY', 'eventVersion': '1.1', 'eventSource': 'aws:dynamodb', 'awsRegion': 'ddblocal', 'dynamodb': {'ApproximateCreationDateTime': datetime.datetime(2024, 6, 19, 19, 44, tzinfo=tzlocal()), 'Keys': {'ForumName': {'S': 'AWS Data Pipeline'}}, 'NewImage': {'Threads': {'N': '20'}, 'Category': {'S': 'Amazon Web Services'}, 'Messages': {'N': '9'}, 'Views': {'N': '500'}, 'ForumName': {'S': 'AWS Data Pipeline'}}, 'SequenceNumber': '000000000000000000040', 'SizeBytes': 105, 'StreamViewType': 'NEW_IMAGE'}}]

	Invoking app.lambda_handler (python3.12)

	Local image is out of date and will be updated to the latest runtime. To skip this, pass in the

	parameter --skip-pull-image

	Building image.......................................................................................

	.....................................................................................................

	.....................................................................................................

	..........................................................................

	Using local image: public.ecr.aws/lambda/python:3.12-rapid-x86_64.
	Mounting /Users/imai.k/Documents/Isoroot/engineeer_blog/DynamoDB Streams With NoSQL

	Workbench/sam-app/hello_world as /var/task:ro,delegated, inside runtime container

	START RequestId: 5be7f9d9-47a9-4013-917d-26bd98db748e Version: $LATEST

	END RequestId: c7280d65-713d-4b5a-a0fb-9a9274729879

	REPORT RequestId: c7280d65-713d-4b5a-a0fb-9a9274729879	Init Duration: 0.87 ms	Duration: 485.93 ms	Billed Duration: 486 ms	Memory Size: 128 MB	Max Memory Used: 128 MB

	{"statusCode": 200, "body": "{\"message\": \"hello world\"}"}
さいごに
DynamoDBの更新を契機に、Lambda関数を起動するフローをローカルに構築することができました。
NoSQL Workbenchを利用すると、DynamoDBのデータ更新をGUIで操作できるため、何かと便利だと思います。
以上です。